Both of the methods, listed below, describe ways in which an individual may choose to register with Connecting Colorado. Once registered within the site, Job Seekers may begin using the job search engine to look for jobs or accessing the site's resources.
Job Seekers who prefer to register in-person may do so through visiting any of the Workforce Centers , located throughout Colorado. The Workforce Centers have many free services and resources to help with the registration and/or job search process.
OR
Online:
The images and instructions, presented below, provide clarification on the steps and process for registering in Connecting Colorado.
Colorado's employment matching website system for Job Seekers and Employers. Also, the state of Colorado's official Unemployment Insurance (UI) "Work Registration" website for UI Claimants.
The Colorado Department of Labor and Employment (CDLE) and the Colorado Workforce Centers provide the Connecting Colorado system as a free service and tool for both Job Seekers and Employers to utilize and to assist them in their efforts of searching for the right job or locating the next star employee for their business.
The registration process (online) can vary in time and take anywhere from 30 minutes to one hour (approximately) to complete.
Steps on How to Register Online For Connecting Colorado
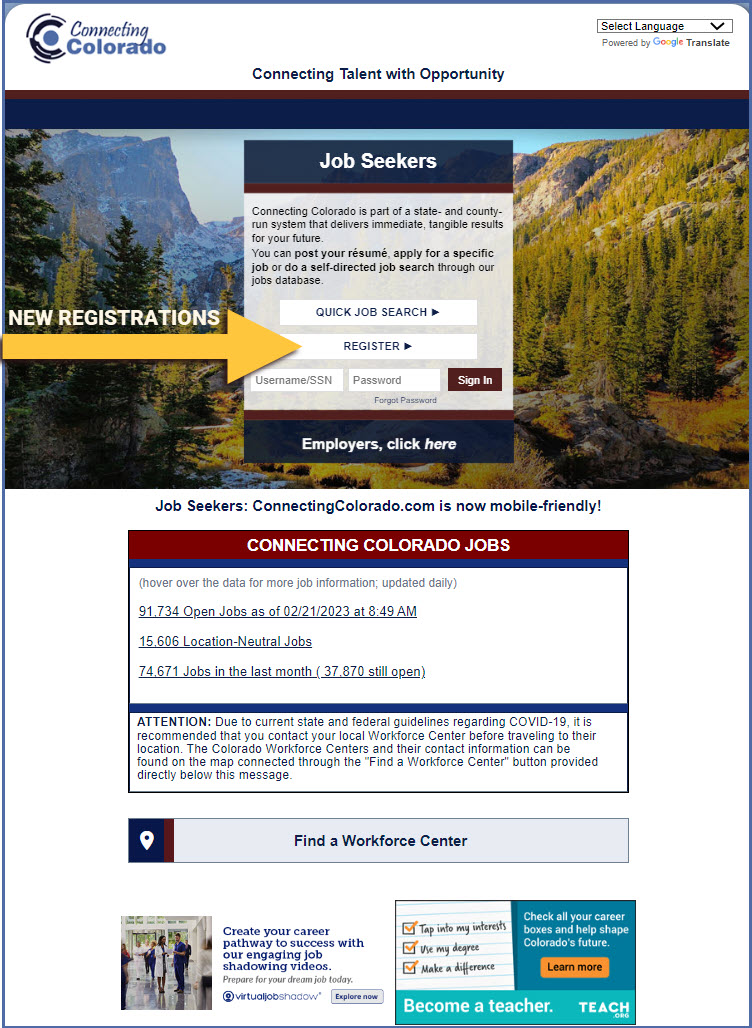
1. Start on the Connecting Colorado website and select the “Job Seeker” link on the right side of the page. This will begin the registration process. This page is also where you will return to each time you use the website.
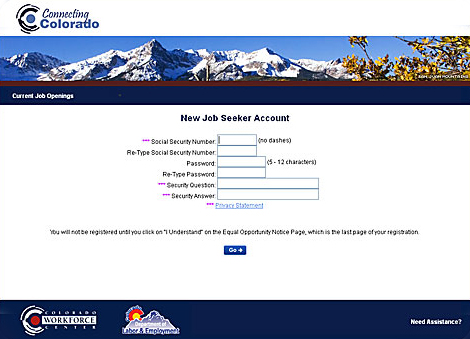
2. First time registrations require you to create a new account. Press the Go button in the left panel to begin.

3. Enter your social security number — you will need to enter it twice for data validation. Enter a password that you will use for future visits to Connecting Colorado — you will need to enter your password twice for data validation.You will need to enter a security question and an answer for password protection.
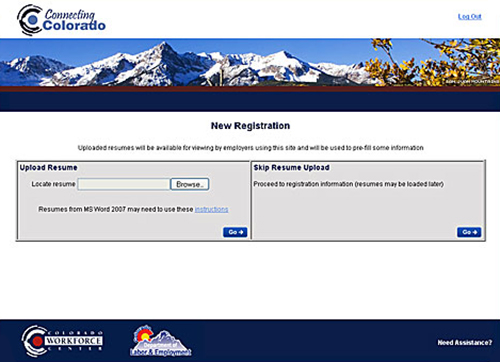
4. After adding your social security number and a password, you have the option of uploading your resume by pressing the “Browse” button in the left panel, locating the resume on your computer, and uploading it by pressing Go. You may also skip this step by pressing Go in the right panel.
Note: Resumes can be uploaded at any time after the registration process.
5. The next part of the process is a page describing the Workforce Self-registration system with a form below to enter your contact and personal information. If you had uploaded a resume, some of the information may have been preloaded in the fields. Verify the information or correct as necessary.You’ll notice some of the fields have a red * in front of them. These fields are required information. The rest of the fields are not mandatory for registration. Any question marks to the right will provide help on that field.
Fill in your contact information as required. Enter your preferences for how employers or the Workforce Center should contact you.
You will also find fields to list your most recent employment information.
Complete as many fields as possible and then press the Go button at the bottom of the page to move forward in the registration process.